Thursday, April 30, 2015

Dining area makeover: in progress


We've lived in our home for four and a half years now. I am still figuring out what I want to do in some spaces. I like to take the process slow, wait for inspiration, or budget friendly solutions... I'm not in a rush. Here's where our dining area is at right now. I'm kind of in the midst of a little makeover because I finally decided what I wanted to do. I knew I wanted slightly mix-matches chairs, and we have 8 chairs that were given to us by my grandmother when she was down-sizing and we were getting married, they just didn't go with the table we bought two years after we moved in. Inspiration struck when I decided to paint our buffet white. The next step is to sand and paint our chairs white also. And I'm waiting on another barrel back chair to paint gray for the other end of the table. Here's where we're at right now:


The photo below is from the day after we moved in, with the original table we had, a hand me down that just was getting weaker in the middle and we could no longer open up to put the leaves in. Same chairs. Dark buffet. Yellow walls. And I think I see some moving boxes sitting out in the background. 
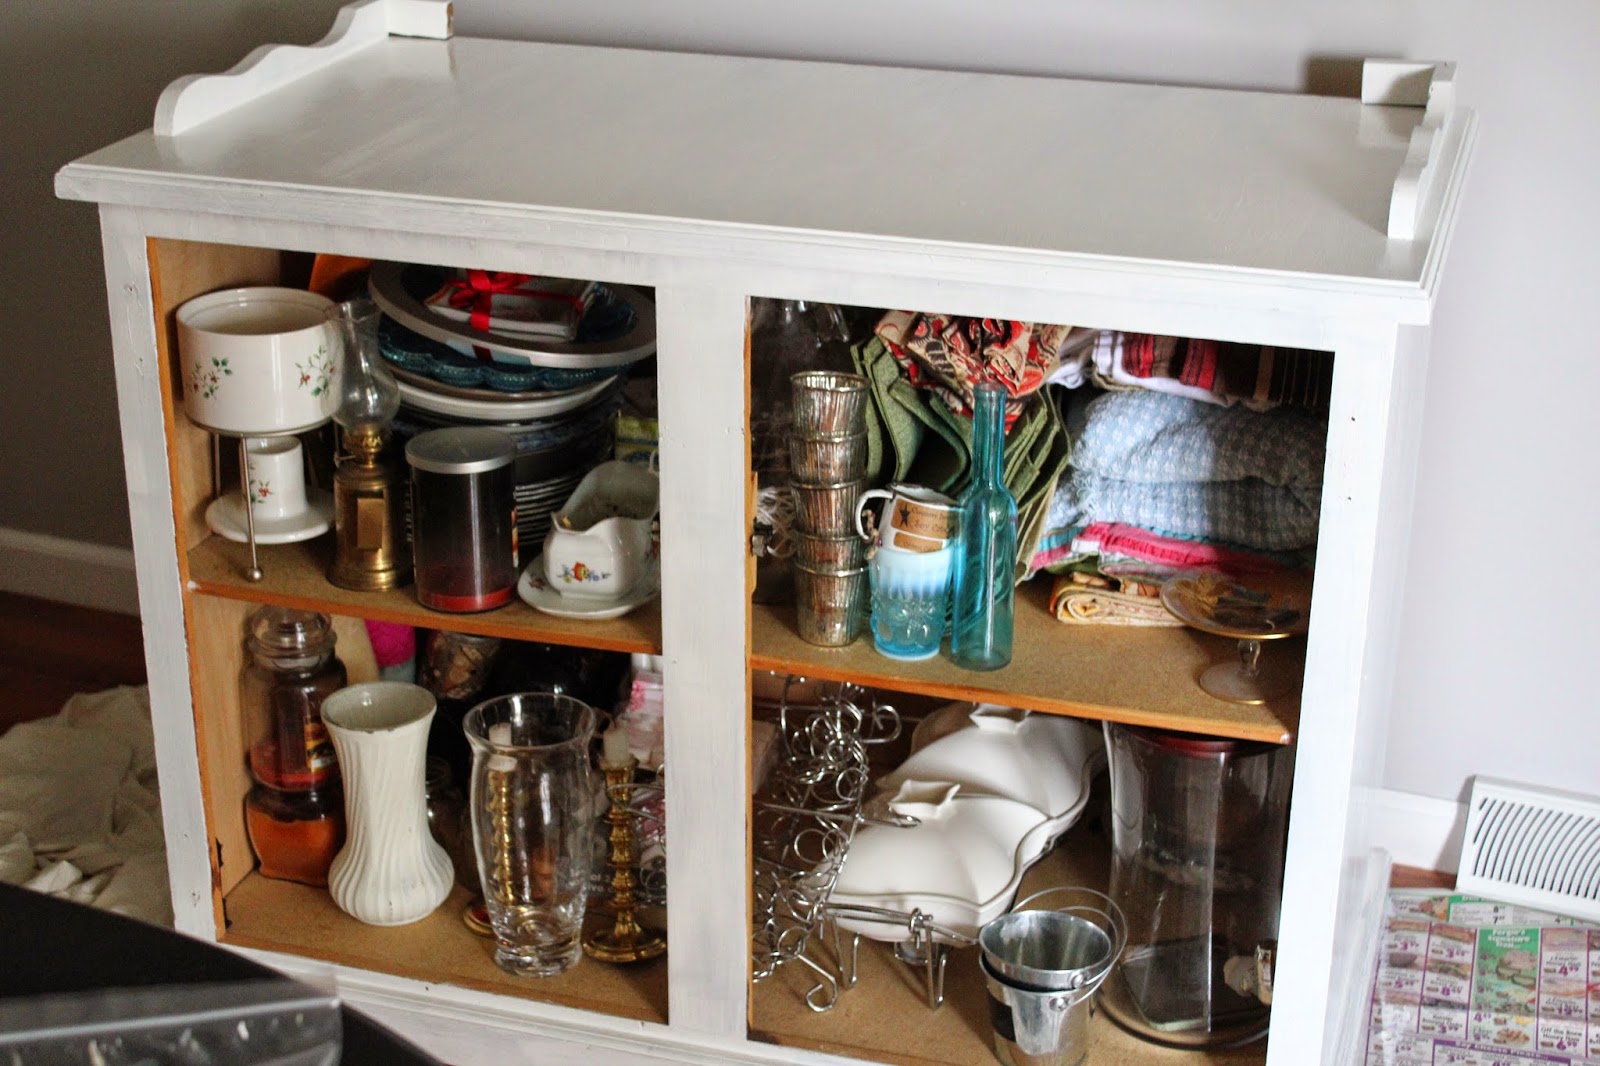
Here are the "befores" the day before I painted the buffet. It wasn't styled at all because I knew I was moving everything off to paint it the next day. 

The during is always scary. Everything is a mess, and I am usually questioning myself. I thought maybe a coat or two of paint. Four coats later it finally looked decent. 


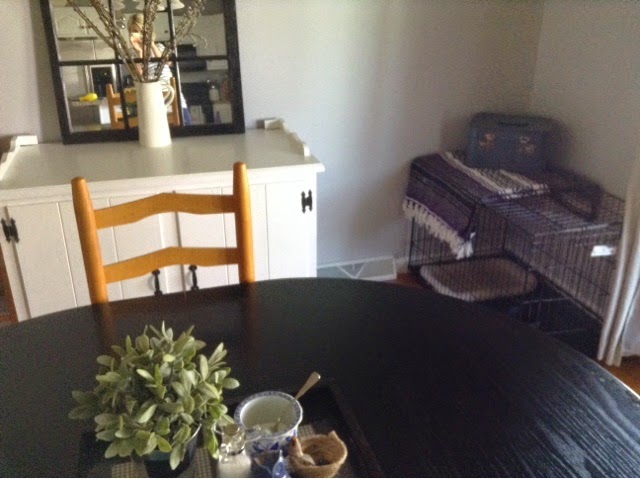
Here are a few more afters (that are really "durings" cause I haven't pained the chairs yet): 

 The plant basket hanging in the corner is my favorite, my sister got it for me for my birthday from amazon. It is a beautiful dark wicker, and I love the life the plant brings to the room.
 I can just see them all painted white in my mind, another gray chair at the other end, the cute cottage-y farmhouse vibe of painted and mis-matched chairs. Hopefully I'll get to this project soon.
 Zion's crate got an update too, thanks to a new-to-me cage my mom said we could have. I just folded a blanket we use at the beach or for picnics to put over top, and I put all of our doggie stuff (leash, treats, bones, little sweater, etc.) in a cute vintage suitcase. My motto is to make what has to be there as cute as possible. Functional beauty. If it has to be part of the house, I might as well try to make it pretty.


So there it is, the painted buffet, and the middle of the process of the dining room update. :)


Monday, April 13, 2015

The in between: winter to spring fashion

I do fashion posts because they're easy. Take a photo, tell where it's from. Hopefully in the process inspire people to wear what they have new ways, know that you don't have to spend a ton or shop at high end places to feel put together, and encourage people to be themselves. Maybe share a great deal or two. But fashion is not my forte', not even a top priority or obsession for me. I enjoy it for the same reason I like painting and photography. It's a chance to be creative, a chance to express myself, a chance to combine pattern, color, texture to create something pretty. I guess I'm just taking the time to say this because I've realized that in my busy-ness I've begun doing more fashion posts, and really the big reason behind that is because they require less to do and are still something fun to share. Did I need to say that? Probably not, but I did anyway. :) I guess I just don't want to be seen as something that really is a very small piece of my life. There are tons of women who could do this. They get up, they get dressed, the are beautiful and unique and original, some are way better bargain shoppers than I think I am, or have way more fashion sense than I do. Ok, heart to heart over, on to the sharing. :)

These are in complete random order, it's been back and forth from warm to cold to freezing to bearable and I'm kind of lost right now... Just trying to add in a little more color as spring s l o w l y unfolds. Also, while it's way easier to take photos on my ipod, the quality isn't as good. Forgive the grainy-ness of some of the photos. Like, some serious grain. Again, I apologize...

This day I just put on every color I could find. A pink scarf, a mint striped top, purple flats, turquoise earrings... It felt fun.
Scarf: Forever21
Striped button down: Target
High waisted jeans: AE
Purple Flats: J. Crew


The above outfit was for a date morning out with Shaun. We went to brunch and then to central market. It actually snowed that morning so I wore a big chunky sweater over this.
Tank: Cotton On
Skirt: Express
Boots: DSW


The following two photos are from the same outfit, I  think I wore it to church. 

Chambray tunic: Target
Stiped tank: H&M
Leggings: Express
Booties: Target
Wrap bracelet: gift from years ago


Striped top: Target
Black moto pants: Victorias Secret
Boots: AE
Pendant necklace: H&M 

The below outfit I wore out with my mom for a belated birthday breakfast at the coffee shop. It was one of the first warmer days we had, we walked around town and it was sooo nice. 

Dress: Modcloth (birthday gift from my mom) 
Jacket: Clearance at Forever21
Boots: DSW

My mom is awfully cute... :)


Dress: Francesca's
Leggings: express
Combat boots: Steve Madden 

Below: What I wore to my cousin's rehearsal dinner.
Dress: Target
Sweater: Express
Tights: H&M
Combat Boots: Steve Madden 
Earrings: AE
Cute Sister: One of a kind. 


Hope these were some fun ideas for ways to add in color while still staying warm... although it's seventy degrees of perfection outside today, and I hope it is here to stay! 


Saturday, April 11, 2015

Making peanut butter eggs


I know Easter is past now, but I have had several requests for the recipe I used to make our peanut butter eggs so I thought I'd go ahead and share it here. You can always make peanut butter balls or reese cup shapes and have them any time of year really... Or you can just file this recipe away in your mind til next Easter. :) Up to you. :)

 16 oz confectioners sugar
1 cup creamy peanut butter
1/4 cup melted butter
1 tbsp. milk
8 oz semi-sweet chocolate 
1 tbsp. shortening
Beat together powdered sugar, peanut butter and butter. Add in milk if needed to get mixture to stick together and be slightly creamy. (I needed about 3 tbsp. milk, just add what you need but you don't want it to get to soft. It should be like a sticky firm dough.) Form into egg shapes (I made 16 but you can make them bigger or small, doesn't matter) and place on cookie sheet. Freeze for one hour. After an hour melt chocolate and shortening in microwave, stirring every 30 seconds until smooth and melted. Dip frozen peanut butter eggs into chocolate until covered, then lay on parchment paper to harden. Enjoy. :) 
Little hands kept reaching in while I was taking my pictures :) 


Thursday, April 2, 2015

"Anthro-Worthy Eggs"

 
So, I got this Pottery Barn magazine with these totally gorgeous beaded Easter eggs on the cover and I thought, I can totally make those. Or at least try. It seemed like something that could be fun to do with the boys. So on a rainy Friday I took my three boys to a craft store in town on a hunt for wooden Easter eggs and a few pretty things to embellish them with. The actual craft store shopping experience was not the most pleasant, and I thought we might not be able to make our purchases before we got kicked out for rambunctious behavior, but we made it. My sister in law came over to make eggs with us, and she is the one who decided that they were "anthro-worthy." I have to agree. They did come out super cute. I know there's only a few days left before Easter, but just in case you want to make some of these cuties yourself I'll tell you what we used.
 
-Wooden Eggs in various sizes
-Pastel paint colors (pink, teal, green, yellow, purple... if you don't have the exact shade you want mix some white with your colors to make them look more spring-like)
-small paint brushes
-gold & silver glitter
-gold & silver sequins
-ribbon
-beads
-glue (Elmer's and hot glue)
 
 
Drew an Isaiah had fun painting their eggs and then sprinkling the  glitter over them, and those simple ones came out adorable. I used elmers glue to add sequins and beads in striped patterns to some, and hot glued ribbon around others. 

For our tiniest eggs I made a twine bird nest for the boys to keep them in just by hot gluing it around and around into the shape of a next. We added a little bird clip to it. It's super cute too I just don't have a photo of it to show you. It's Drew's favorite. (Jaden tries to steal the eggs out of the nest all the time)
 
I filled a wooden bowl with some moss and set my eggs in that and have them on my end table in our living room. I love the soft spring addition of color and texture they are. My favorite thing about them is that they are so sturdy since they are wooden and I will be able to re-use them each year.
 
Happy egg making!!